
How to Create and Assign Inductions
Learn how to create and assign inductions for your employees to based on their work type, equipment, or site in Kiri Align.
Inductions are generally conducted to welcome new employees to the company and prepare them for their new role. It ensures that employees are fully informed about the organisation and are aware of their work and responsibilities.
Inductions are generally conducted to welcome new employees to the company and prepare them for their new role. It ensures that employees are fully informed about the organisation and are aware of their work and responsibilities.
In the Kiri Align application, you can add an induction not just for new employees, but also other employees if you have new equipment or new job location that they need to be trained for.
- Click on ‘Add new induction’ to create and assign quick and flexible inductions for your employees, business partners - based on their work type, equipment, or site.

- Once you click the ‘Add New Induction’ button, you get a screen like this:

Details Section
- Fill all the mandatory fields in the details section so that you can get to the next, i.e. questions section.Note: Every checklist needs to have a title, description, category, and its recurrence type.
- Mark the status of any checklist as ‘Active’ or ‘Inactive.’A checklist can be marked as inactive if it is no longer used but can’t be deleted as it has some history attached to it, and the history needs to be saved in the application.

- Click ‘Save and Next’ to start adding the questions/tasks that you want your new employees to answer/mark done.You can click on the ‘Save & Exit’ button to save the checklist while creating and/or editing it.

Questions Section
There are various types of questions or response types of the answer that you can set for the questions in your checklist:
- Yes/No - Used for a question whose expected answer is either yes or no.
- Rich Text - Can be used to add text with formatting like a word document.
- Text - Used for a question whose expected answer is in simple text format.
- Date - Used for a question whose expected answer is in date format.
- Number - Used for a question whose expected answer is in number format.
- Long Text - Can be used for adding notes or instructions for the person undertaking the list.
- Employee - Used for a question whose expected answer is the name of an employee.
- Equipment - Used for a question whose expected answer is the name of an employee.
- Photo (Document) - Used for a question whose expected answer is to be uploaded in the form of a document. The file formats that you can upload are PNG, JPG , PDF, Video in MP4 format, and DOC files.
- Video (Youtube/Vimeo) - Used for a question whose expected answer is to be uploaded in the form of a video.
- Time - Used for a question whose expected answer is in time format.
- Multiple Choice - Used for a question whose expected answer is to be chosen from the options provided.
- PDF - This question type can be used to upload PDF files while creating the checklist. Also, the uploaded PDF files can be viewed while undertaking the checklist.
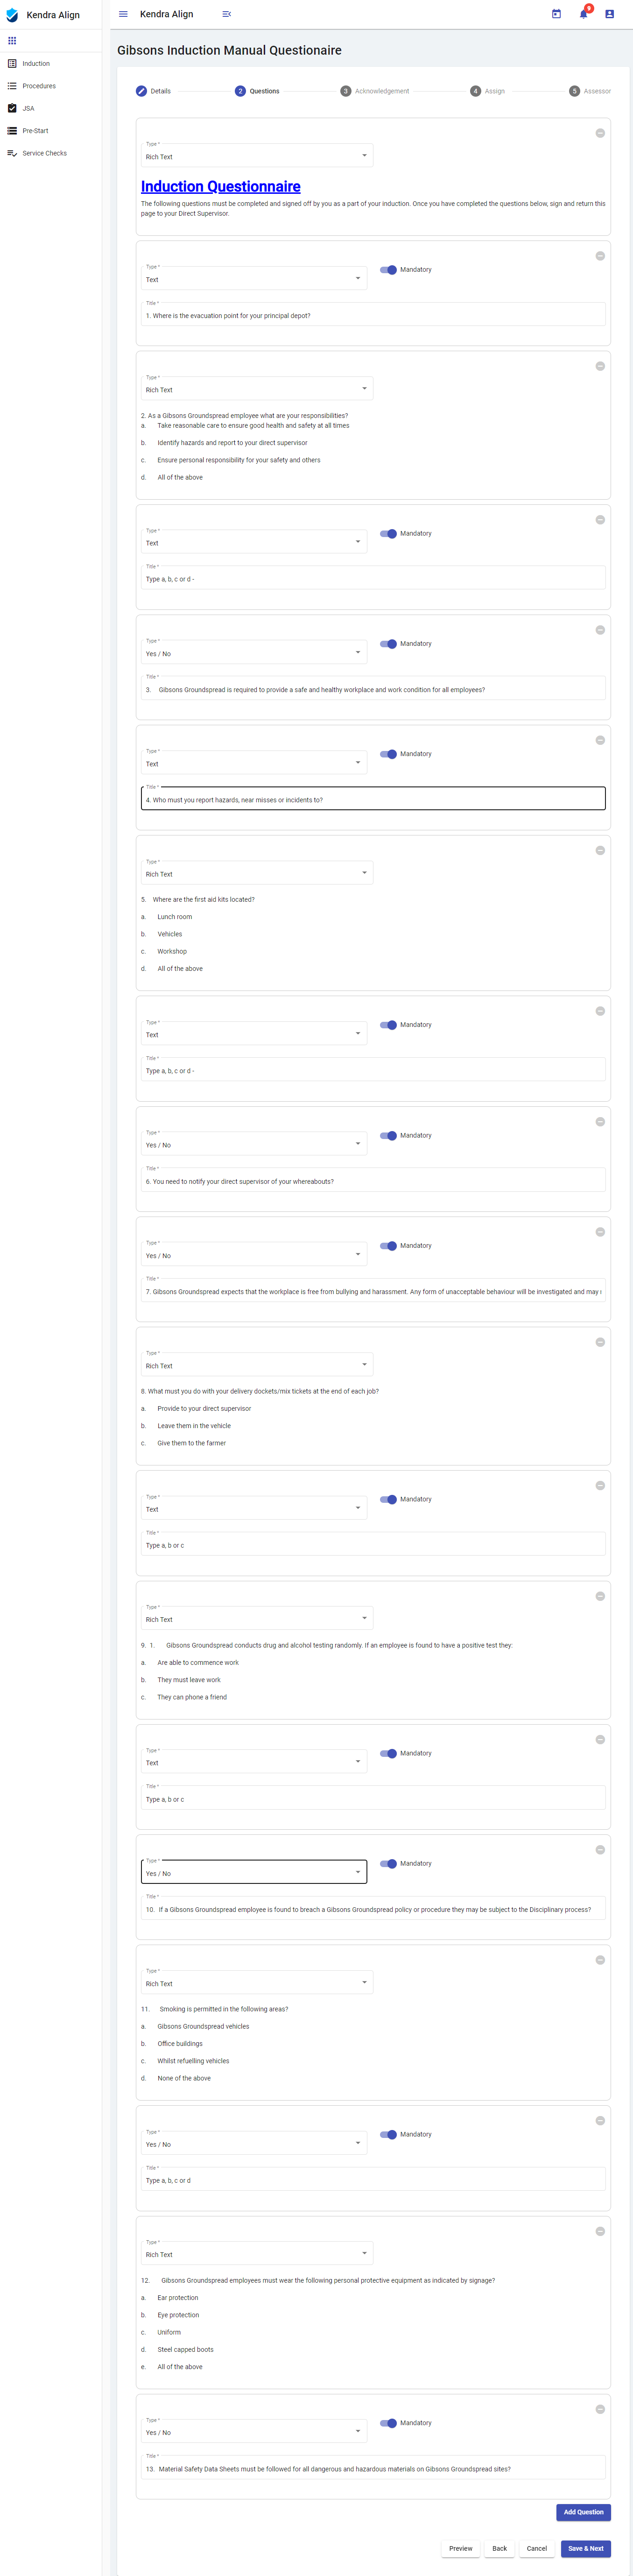
- Click the ‘Add Question’ button to add another question to your induction checklist or click ‘Save & Next’ to get to the next section.
- Note:
- Keeping the ‘Mandatory’ button on for the questions will add an asterisk sign near the question. This will make the question mandatory to be answered by the one undertaking the checklist.
- It is also easy to rearrange the questions by just dragging and dropping, in case you need to change the sequence of the questions.
- You also have options to preview the checklist, go back to the previous section, or cancel the changes that you made into the checklist using the ‘Preview’, ‘Back’, and ‘Cancel’ buttons.
Acknowledgement Section
- Choose the type of acknowledgement for the checklist:
- No Acknowledgement
- Acknowledgement Message
- Acknowledgement with Signature

- Next, enter an acknowledgement message if needed and go to the Assign section.
Assign Section
- Select the roles and employee names the checklist is to be assigned to and save the induction checklist.
 Note: The roles/employees must be added to the system so you can directly select them from the dropdown here.
 - Next, click on the ‘Save and Next’ button to go to the Assessor section.
- It is not necessary to have an assessor for each checklist that you create. So you have a ‘Yes/No’ button before the accessor section. You can select ‘No’ if the checklist does not require to be assessed by an assessor.
Assessor Section
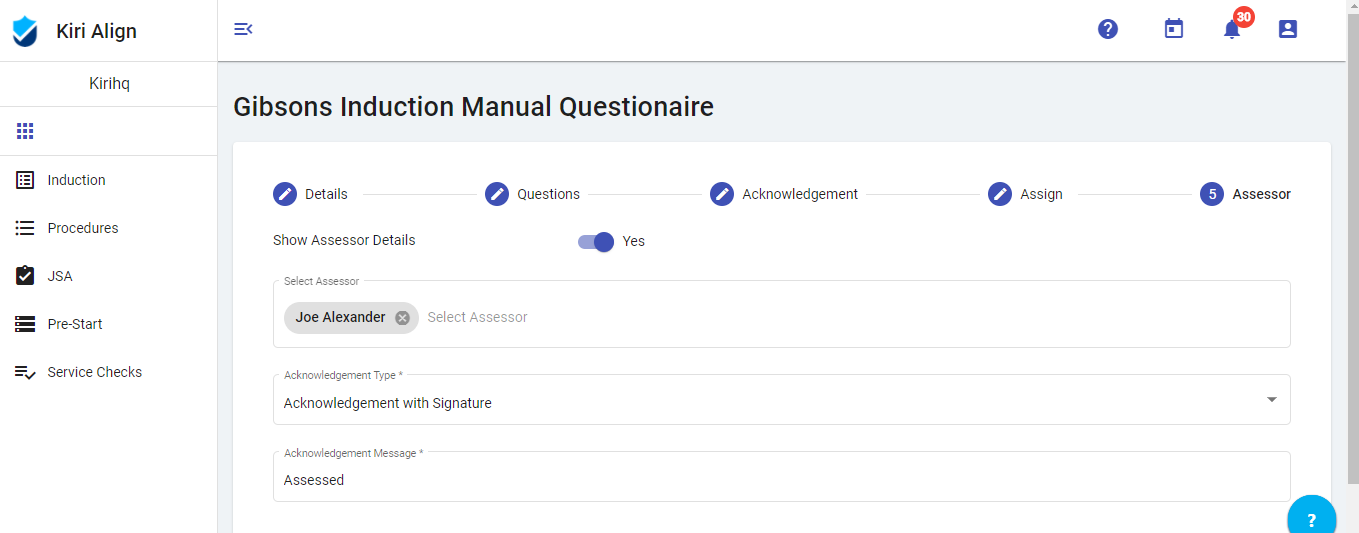
In this section, you can select the assessor from the dropdown provided. This person will be responsible to assess the induction undertaken by the assignees.
Add acknowledgement type and message. Click ‘Save’ to save the checklist.
Note: The Assessor section is not mandatory. It can also be skipped if you don’t need a checklist to be assessed.

